diff options
| author | F1F7Y <64418963+F1F7Y@users.noreply.github.com> | 2023-06-22 11:47:46 +0200 |
|---|---|---|
| committer | GitHub <noreply@github.com> | 2023-06-22 11:47:46 +0200 |
| commit | 89996405ee6341252836d606d5de02fff83ec3ab (patch) | |
| tree | d8e70b4f8a1a2d125e4693806799477f6a46bfe7 /BUILD.md | |
| parent | 9cf27a61fd7e096f816c512375ef2340ea4dfb10 (diff) | |
| download | NorthstarLauncher-89996405ee6341252836d606d5de02fff83ec3ab.tar.gz NorthstarLauncher-89996405ee6341252836d606d5de02fff83ec3ab.zip | |
Move to cmake (#467)v1.15.0-rc1
Moves the entire project to cmake as the build system
Diffstat (limited to 'BUILD.md')
| -rw-r--r-- | BUILD.md | 21 |
1 files changed, 13 insertions, 8 deletions
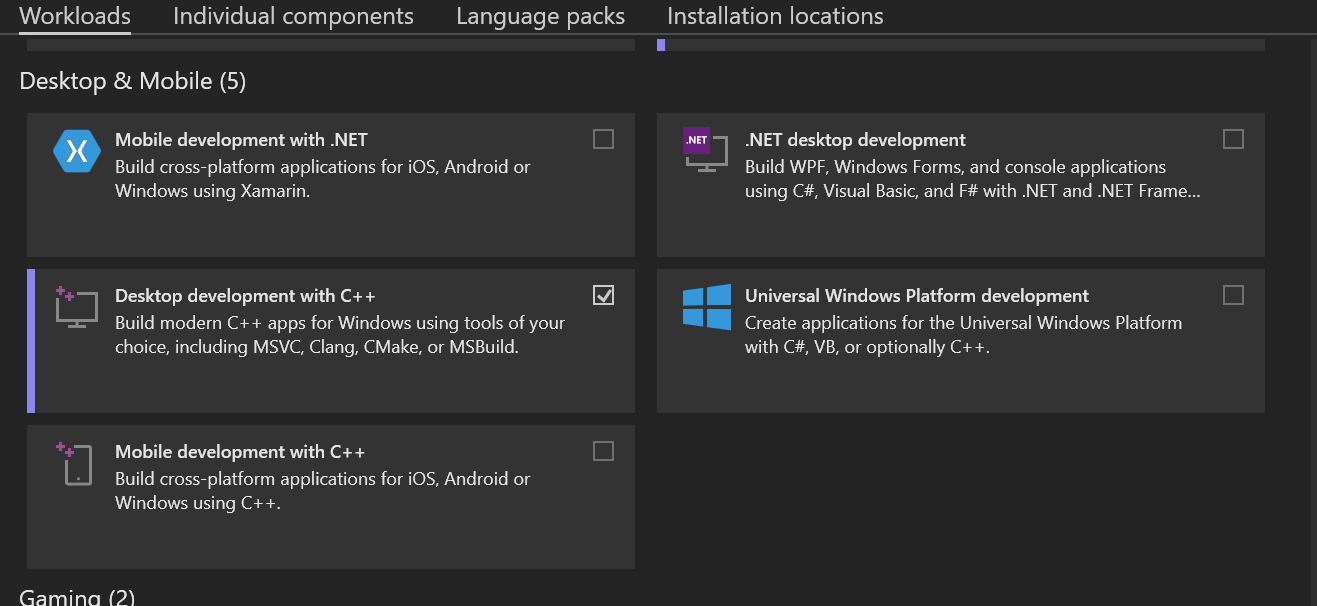
@@ -12,26 +12,31 @@ The following steps will allow you to compile your own NorthstarLauncher executa  -6. **Open the NorthstarLauncher folder** you unzipped with Visual Studio. A tab should open on the right hand side titled "Solution Explorer." +6. **Open the NorthstarLauncher folder** you unzipped with Visual Studio. +7. You may be prompted by visual studio to generate the cmake cache. To do this open the root `CMakeLists.txt` and click **Generate**. Once you do this you should be able to build the project. + -This is a good time to edit the code. From the Solution Explorer, you can find any file you want to modify and do so. Don't forget to save your changes. +8. In the top ribbon, press on **Build,** then **Build all.** -7. **Double click on R2Northstar.sln** in the Solution Explorer. If you have not installed the Desktop Development Workload, you might be prompted now. If everything is correct, the Solution Explorer should change to two files: Northstar and NorthstarLauncher -8. In the top ribbon, press on **Build,** then **Build Solution.** - - + 9. Wait for your build to finish. You can check on its status from the Output tab at the bottom -10. Once your build is finished, **Open the directory in File Explorer.** Then, go to x86 > Debug. You should see NorthstarLauncher.exe and Northstar.dll, as well as a couple other files. +10. Once your build is finished, **Open the directory in File Explorer.** Then, go to `build/game`. You should see NorthstarLauncher.exe and Northstar.dll, as well as a couple other files. 11. **_In your Titanfall2 directory_**, move the preexisting NorthstarLauncher.exe and Northstar.dll into a new folder. You'll want to keep the default launcher backed up before testing any changes. 12. Back in the build debug directory, **Move NorthstarLauncher.exe and Northstar.dll to your Titanfall2 folder.** If everything is correct, you should now be able to launch the Northstar client with your changes applied. +Alternatively you can move your game to the `build/game/` folder and launch directly from visual studio instead of copying the files manually. + ### VS Build Tools Developers who can work a command line may be interested in using [Visual Studio Build Tools](https://visualstudio.microsoft.com/downloads/#build-tools-for-visual-studio-2022) to compile the project, as an alternative to installing the full Visual Studio IDE. -Follow the same steps as above for Visual Studio Build Tools, but instead of opening in Visual Studio, run the Command Prompt for VS 2022 and navigate to the NorthstarLauncher, then run ```msbuild```, which will build the project for you. +- Follow the same steps as above for Visual Studio Build Tools, but instead of opening in Visual Studio, run the Command Prompt for VS 2022 and navigate to the NorthstarLauncher. + +- Run `cmake . -G "Ninja"` to generate build files. + +- Run `cmake --build .` to build the project. |
